
Copyright © Had2Know 2010-2026. All Rights Reserved.
Terms of Use | Privacy Policy | Contact
Site Design by E. Emerson
How to Drill Holes in Glass or Stone to Make Beads
Sea glass and polished stones make for unique jewelry accents. If you don't drill holes in your pieces, you are basically limited to gluing them within a setting. But if you have a drill press or dremel tool with a diamond core drill bit, you can transform your gems into beads with limitless possibilities.
To successfully drill beads without breaking the material--or accidentally drilling a hole in your hand--you need to gather the right materials and set up your work station properly.
Things you'll need to wet drill beads:
- dremel tool or drill press with diamond tipped or diamond core drill bit
- plastic, glass, or metal dish about 2-3 inches deep
- hot glue gun and glue sticks
- pieces of glass, ceramic, or stone to make into beads
- protective eyewear
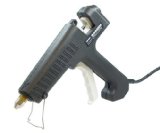 glue gun |
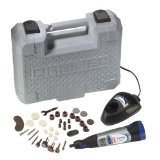 Dremel kit |
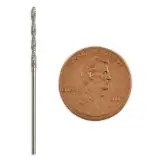 drill bit |
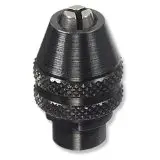 keyless chuck |
(Step 1) Use a pencil to mark the hole location for each piece of sea glass and polished rock that you want to drill. For larger pieces, mare the hole near the outer edge to make pendant beads. For more spherical shapes, mark the hole in the center to make string beads.
(Step 2) Add hot glue to the bottom of an old dish and place the gemstones and sea glass in the dish so that they are 1/2 - 2/3 of the way submerged in glue, pencil mark face up. When the glue sets, the stones will be stabilized to allow for easy drilling.
If you don't stabilize the beads in some medium, they may slip while you drill, leading to breakage. And of course, you should not use your hands to hold small beads while drilling because you can easily drill your hand! Glue sticks provide the best medium because the glue can be removed with moderate effort. You can just as easily use Elmer's glue, but it takes a long time to remove it from the beads. Plus, it dissolves too much while drilling, making the water cloudy.
(Step 3) When the glue has completely hardened, add enough tepid water to the dish to cover the stones and sea glass.
Water performs several crucial functions in wet drilling: (1) It is the ideal lubricant. (2) Water has a high specific heat capacity, which in layman's terms means that it quickly dissipates the heat caused by drill friction. Without some medium to absorb the heat, the beads will shatter. (3) It catches the minute particles of glass and stone so that the particles don't get in your eye.
(Step 4) Start drilling the beads one at a time. Have patience, because it takes a long time to drill through glass and rock. For longer holes, you must move the drill bit up and down to allow water into the hole so that the bead cools. If the bead gets too hot, it will crack.
Tip: This will increase the amount of time it takes to make beads, but will result in prettier, more cleanly drilled beads. Instead of drilling all the way through in one round, drill half way through, then complete the tunnel from the opposite end. You will have to redo Steps 1-4, but it is worth it if you have the time. Reason? The entry point of the drill is smoother than the exit point, in fact, glass and rock often chips where the drill exits. By drilling from both ends, you will have two clean openings on both sides.
© Had2Know 2010